One of the biggest challenges when making foam armor is how to seal and paint it so it actually looks like armor and not “foam with paint thrown on it.” Most of my armor is made out of foam and I have been complimented on how “metallic” it looks. Here are a few examples:


This is another excerpt from my upcoming Raiden: Metal Gear Rising armor tutorial that can apply to anyone trying to paint foam armor.
—
Materials I used for this stage (Paid links):
- Heat Gun
- Roscos Flexbond (But Mod Podge works fine if you can’t find flexbond)
- Disposable Chip Brushes
- Plasti Dip Rubber Coating Spray
- Organic Vapor Mask/Respirator
- Automotive Filler Primer Spray Paint
- Metallic Black Spray Paint
- Bulldog Adhesion Promoter
(Pricey but an excellent brand that adds some flex)
- Automotive Clear Coat Spray Cans
Foam Materials List
- 1/4″ Thickness Anti-fatigue Foam Flooring mat (smooth on one side)
- 1/2″ Interlocking Anti-Fatigue Foam Mat
- 6mm Thickness Foam Sheets (9″X12″)
- 2mm Thickness Foam Roll (30″ x 60″)
In order to paint foam, it needs to be properly sealed or else paint will seep through the pores of the foam and will not be smooth. I have experimented with a few methods that I have researched through google and therpf.com (user DocHolliday has a lot of good methods) and this has produced good results from me.
Steps:
-
- I used a heat gun to pass over the foam until there is a slight glimmer/sparkle on the foam. You’ll know when you see it. I pass over the foam with the heat gun twice just to make sure the entire surface area is hit.
- One the foam is cooled, I used a brush to coat the foam with 2 layers of Rosco’s Flexbond (Recommended by a user named “Full Metal Sam”) which is a sealant that I found more effective than sealing with PVA glue (white glue) or Mod Podge. When I used PVA and Mod Podge in the past, I used 8 layers with about an hour of drying between layers.
- I let the sealant dry over night, and then I sprayed the pieces with 3 layers of Plastidip, waiting for each layer to dry for lat least 30 minutes before applying the next coat. You’ll know if you sealed the foam correctly here if you end up with a smooth application of Plastidip and no pores on the foam. Always remember to wear a good organic respirator as this stuff is toxic.
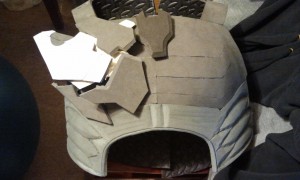
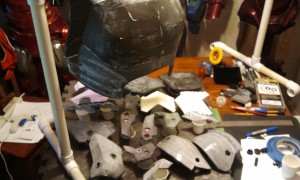
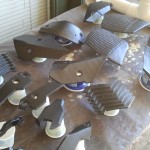
- Plastidip pieces
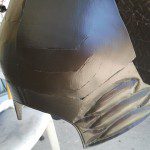
- Plastidip on torso
- After letting the last coast of Plastidip dry for at least 4 hours, I sprayed the piece with 2 layers of Bulldog Adhesion Promoter per the instructions on the label, and then automotive primer. The primer is important as it will make your color look much better.
- Once the primer has dried for the recommended time per the label, I applied my color coat. For Raiden, I used a Metallic Black.
- I sprayed both Bulldog Adhesion Promoter and a Clear Coat spray on the dry piece to give it some shine and an extra layer of protection. The clear coat will give the paint the final pop so it looks shinny and metallic.
So there you have it. With the above tips, you can have a nice finish on your foam armor that will look nice and metallic. Questions? Feel free to comment below.




22 Comments
nerdom · October 22, 2013 at 7:55 pm
Oh my gosh. THANK YOU SO MUCH! I was having trouble with my armor looking like foam. This helps so much!
Andrew Makes Things · October 22, 2013 at 7:56 pm
Glad I could help!
lalala · February 5, 2014 at 3:09 pm
Where did you get your Rosco’s Flexbond and which type of Plastidip did you use? There seems to be many varieties including “multi-purpose”, “primers”, etc… and thank you!
Andrew Makes Things · February 7, 2014 at 2:32 pm
Did you try the links in the post? I’m pretty sure I put all the info in there on what products were used and where to find them.
freddyness · March 11, 2014 at 1:57 pm
What foam did you use?
Andrew Makes Things · March 18, 2014 at 7:37 am
There are some links on the material lists.
topp · May 17, 2014 at 12:56 pm
It doesn’t say what type of foam you used :S
Andrew Makes Things · May 19, 2014 at 9:04 am
I used 1/4″ foam that’s pretty much like this
TheQuantumHelix · July 14, 2014 at 10:06 pm
Likely a dumb question, however, is the foam hardened after painting, or does it retain its softness at all? I’d like to use this method as opposed to duct tape / HVAC tape for prop sword making, however I need it to stay somewhat flexible and non-painful to be hit by. Could I possibly drop the plastidip step and have the paint still hit and stick, if it does harden up?
Andrew Makes Things · July 16, 2014 at 8:21 am
No, not a dumb question. The plastidip is flexible… basically it’s a rubber/plastic coating. Flexbond/modpodge/pva glue are all thin layers as well. None of those products make foam stiff enough to be solid, so the foam retains its flex. If you skip the plastidip step, paint will still look okay, but in my experience the paint job will be less durable which will lead to paint cracking and and coming off sooner.
DebbieW · July 30, 2014 at 7:15 am
This is very helpful. Thank you for posting this. I have a question about the plasti dip in regards to spraying both sides of the foam. Do have to wait 4 hours to spray the other side of foam or does the plasti dip literally dry in 30 mins?
Andrew Makes Things · July 30, 2014 at 11:01 am
I just spray the outside, but if you need to spray both sides you could do one side first, other side half an hour – hour later, then do the original side again after 30-60 min, then flip one more time. I usually go with 2 coats. It dries to the touch after 30-60, but I believe it takes the 4 hours to fully cure.
Stina · August 1, 2014 at 2:34 am
Hey Andrew, thanks for a great read.
However, I was wondering + instead of using all those different sealers and whatnot, wouldn’t it be easier just to mix some prosaid (or even simpler Display mount) or something with metallic paints? Talc it down and then make a new coat with acrylic paints?
I can totally see where you’re going with everything, though to save time do you reckon that would work?
I am very new to making Cosplays, though I have background in prosthetic makeup, so to me all of this looks very time consuming where I’m use to having, sometimes, limit budget and time to get a job done. 🙂
Andrew Makes Things · August 1, 2014 at 6:05 pm
Hi Stina – The method I outlined is just what I use, but if anyone wants to improve the technique feel free to experiment! I haven’t tried what you said, nor do I know what some of those things are but if you do try that method please let me know how it goes. I’m always looking for new ideas.
Andra · October 13, 2014 at 8:04 am
Did you dilute the flexbond, and what ratio did you use?
Andrew Makes Things · October 18, 2014 at 5:53 pm
Sometimes. It depends on the foam cause it’ll be different depending on the material. I recommend you test it on a scrap piece before trying it on your prop.
Alphonse Elric Cosplay Tutorial (Full Metal Alchemist) | Otaku and Fit · April 14, 2014 at 12:48 pm
[…] I debuted my Alphonse Elric armor at Anime Los Angeles 2014 to assemble a Full Metal Alchemist group with a few of my friends. All in all, it took about 2 months to finish Alphonse taking my time. As with most of my cosplays, the armor was made out of foam with my usual method of sealing and painting which you can read about here: How to Seal and Paint Foam Armor for Cosplay […]
Siris and Isa Helms | Heavenly Hedgehog Crafts · September 9, 2014 at 2:26 pm
[…] next time we do foam armor, I think that we’re going to try to follow this armor tutorial from Otaku and Fit. It adds in a few more steps that we had to skip to make up for some poor time […]
How to Cosplay Venom Snake (Metal Gear Solid V: The Phantom Pain) Tutorial - Otaku and Fit · January 28, 2015 at 2:46 pm
[…] How to Seal and Paint Foam Armor for Cosplay […]
Foam Buying Guide for Cosplay Armor - Otaku and Fit · January 28, 2015 at 7:11 pm
[…] How to Seal and Paint Foam Armor for Cosplay […]
Venom Snake Cosplay Arm Commission/Tutorial Photos (Metal Gear Solid V) - Otaku and Fit · January 29, 2015 at 8:24 pm
[…] How to Seal and Paint Foam Armor for Cosplay […]
Planning your Budget Armor - Cosplay Cents · June 3, 2015 at 12:21 pm
[…] How to Seal and Paint Foam Armor […]